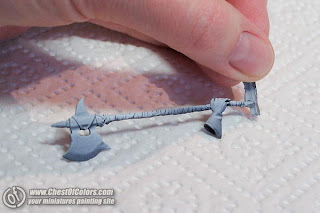
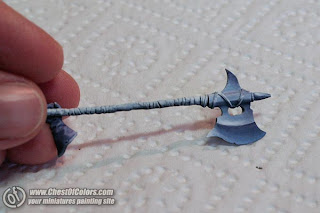
I won't bore you with talking about painting the whole model. I chose more interesting parts for you, like the axe, the hair and the base.
(For those who haven't been following the subject, painting the shield has already been covered earlier on my blog. And I have posted a review of this model already.)
So let's get the show started ;)
Nie będę smędzić o malowaniu całości. Wybrałam dla Was co sensowniejsze kąski: topór, włosy i podstawka.
(Dla niezaznajomionych, relacja z malowania tarczy znalazła się już wcześniej na blogu. Tak samo recenzja modelu).
A więc otwieramy nasz teatrzyk ;)
This is how I painted the axe. (Of course it's only one of many ways of painting NMM, so there's no need to get too attached to this method ^^)
The paints I used:
- P3 Morrow White
- Vallejo MC 807 Oxford Blue
- Vallejo MC 902 Azure
- Vallejo GC 72019 Nigh Blue
- Vallejo GI (ink) 72091 Sepia
This means I used mainly the colors that I had already used for painting the model, with a slight diverson for Vallejo GC 72019 Night Blue, that was used as the "focus".
Oto jak malowałam topór. (Jest to jeden z setek sposobów malowania NMM, więc nie ma co przywiązywać się do tego jednego ^^ )
Farby jakie były w użyciu to:
- P3 Morrow White
- Vallejo MC 807 Oxford Blue
- Vallejo MC 902 Azure
- Vallejo GC 72019 Nigh Blue
- Vallejo GI (ink) 72091 Sepia
Czyli właściwie kolory wykorzystałam z tego czym dotychczas malowałam model, z drobnym odstępstwen w postaci Vallejo GC 72019 Night Blue, zastosowanego jako "focus".
I started cautiously, because I needed to find a way to deal with such a big element. I haven't painted anything in this scale for a long time.
I had a dilemma: Should I paint flat chiaroscuro? ... or maybe NMM would make it impossible? Eventually I found out that flat-painted NMM is actually like... plastic ;))) especially in this scale. Even though it seems obvious, I had to test it by myself, hehehe. But let me return to the start:
So I started with Azure and began shading.
Zaczynałam ostrożnie - no bo jak tu potraktować tak duży element? - dawno nie malowałam w tej skali.
Miałam dylemat: Czy malować płaski światłocień? ... a może NMM to uniemożliwi? Ostatecznie okazało się że NMM malowany płasko to plastik ;))) zwłaszcza w takiej skali. Oczywista oczywistość, ale trzeba było sprawdzić na własnej skórze, hehe. Ale wrócę do początku:
A więc chwyciłam za kolor Azure i rozpoczęłam cieniowanie.
Soon I got bored with this nauseous color and switched to Oxford Blue.
Szybko się zniecierpliwiłam do tego mdłego koloru i przerzuciłam się na Oxford Blue:
That's the way I held the brush while shading:
W tym kierunku trzymałam pędzel cieniując:
I found some use for Azure (since I already had it on my palette, I couldn't allow it to be wasted ;)) I added it to Night Blue to make it more subtle:
That's how I fixed my highlights with white:
Tak poprawiałam rozjaśnienia bielą:
Then I picked Oxford Blue up again and a with a thin (5/0) paintbrush I painted thin strokes of damage:
Chwyciłam spowrotem za Oxford Blue i cienki pędzelek (5/0) namalowałam kreski jako uszkodzenia:
I think that such lines look better when they're painted next to other, light strokes - like reflections of light on such scratches.
Eventually I decided to add some Sepia to bind this element with the rest of the model, but this choice also happened to add a little variety to the final effect:
Takie linie wydają mi się atrakcyjniejsze, kiedy mają w sąsiedztwie jasne linie - jakby odbicie światła na rysach.
Na koniec zdecydowałam się dodać trochę Sepii dla zcalenia tego elementu z reszą modelu, ale przy okazji trochę urozmaiciło to efekt końcowy:
Na koniec zdecydowałam się dodać trochę Sepii dla zcalenia tego elementu z reszą modelu, ale przy okazji trochę urozmaiciło to efekt końcowy:
And that's it regarding this subject.
But I also prepared a few photos depicting how I painted her hair.
I to by było na tyle w tym temacie.
Za to przygotowałam kilka fotek z malowania włosów:
Za to przygotowałam kilka fotek z malowania włosów:
The paints used were:
- P3 Morrow White and Vallejo MC 807 Oxford Blue - chiaroscuro
- Vallejo Model Air 71077 Wood
- Vallejo GI 72085 Yellow
- Winsor&Newton Ink 965 Orange
- Vallejo MC Woodgrain
Farby to:
- P3 Morrow White i Vallejo MC 807 Oxford Blue - świałocień.
- Vallejo Model Air 71077 Wood
- Vallejo GI 72085 Yellow
- Winsor&Newton Ink 965 Orange
- Vallejo MC Woodgrain
And now something about the base:
The base of this model is built around a ready concept (which, I think, happens to me quite often recently ;)) I used a ready base from Scibor. Nota bene I purchased a larger batch of bases some time ago. In my opinion there's a lot going on on them and they're filled with decorations in a creative way. If I was to nitpick, I would mention mistakes of esthetic kind rather than creative ones. Namely, bases with rounded edges aren't shaped neatly enough. Of course you can smooth the edges by yourself, but I wouldn't be myself if I wouldn't find a reason for a rant ;P
No i parę słów o podstawce:
Podstawa dla tego modelu oparta była na gotowym pomyśle (coś mi się to ostatnio często zdarza ;)) Wykorzystałam do tego podstawkę produkcji Scibora. Nawiasem mówiąc jakiś czas temu zrobiłam całkiem spory zakup podstawek. Moim zdaniem są pomysłowo przepełnione wydarzeniami i zdobnikami.
Jeśli miałabym wytykać błędy, to raczej natury estetycznej, a nie kreatywnej. A mianowicie podstawki z zaokrąglonymi ściankami są miejscami niestarannie wyprofilowane. Wprawdzie można to sobie dopiłować, ale nie była bym sobą jak bym na coś nie pokręciła nosem ;P
Back to my work, I chose a base that seemed to match the general personality of the character depicted, although I am really not up to date with comics about this character. :/
After priming I applied initial chiaroscuro with an airbrush:
Ale wracając do mojej roboty, wybrałam taką która wydawało mi się, że pasuje do klimatu postaci, chodź w kwestii lektury komiksu mam niestety zaległości :/
Po spodkładowaniu, nałożyłam aerografem wstępny światłocień:
Po spodkładowaniu, nałożyłam aerografem wstępny światłocień:
So these were: Vallejo MC807 Oxford Blue and P3 Menoth White Highligh
Next I covered it with Citadel Washes Devlan Mud and added P3 Black in recesses (I think I used P3 Menoth White Highlight again in the lightest parts).
To były: Vallejo MC807 Oxford Blue i P3 Menoth White Highlight.
A tu pokryłam ją Citadel Washes Devlan Mud, i w zagłębieniach dołożyłam P3 Black (chyba jeszcze w najjaśniejszych miejscach jest potraktowana ponownie P3 Menoth White Highlight):
Trying to decide what to do next:
Kombinuję co dalej:
While highlighting sand, remember to make brushstrokes in the direction in which light is falling on it:
Rozjaśniając piasek pamiętaj, żeby pędzel pracował właśnie tak jak rozchodzą się promienie światła:
Birch tree seeds must be the most popular imitation of leaves for miniatures. I took my dry pastels and colored mine with autumn colors.
Nasiona z brzozy to chyba najpopularniejsza imitacja liści. Wyciągnęłam suche pastele i zabarwiłam moje liście w jesienne barwy:
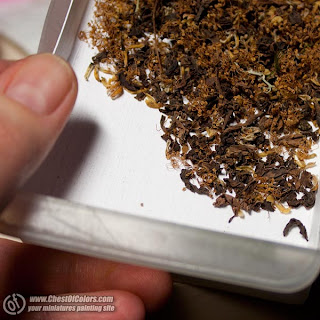
But then there are also dried tea leaves, which I also like to use:
Ale są jeszcze zasuszone liście herbaty które też mi się przydają:
And that's what the base looks like after attaching it to the model:
A tak wygląda zespolona z modelem:
If you want to see the finished model, just follow the link to painted Verthandi.
You may be wondering why I called this article a mega-tutorial. Why? Because there are almost 60 photos used for this article alone. Add the other parts mentioned earlier in this post, and you have something really big.
Now tell me, please, have you ever painted a 54mm model? Are you going to do it now?
And what are your favorite basing methods? Do you have any tricks you would like to share with other readers?
Jeśi chcecie zobaczyć skończony model, skorzystajcie z linku do pomalowanej Verthandi.
Może zastanawiacie się czemu nazwałam ten artykuł mega-tutorialem? Dlaczego? Otóż dlatego, że do samej tej części tutoriala użyłam niemal 60 zdjęć. Dodajcie do tego inne części tutoriala, o których pisałam wcześniej i macie na prawdę spory artykuł.
A teraz powiedzcie, malowaliście już kiedyś model w skali 54mm? A czy teraz zamierzacie się za taki zabrać?
No i jakie są wasze ulubione metody dekorowania podstawek? Czy macie jakieś swoje sztuczki, którymi chcielibyście podzielić się z innymi czytelnikami?


